

Overview
This page walks through one Portal transfer in the app, screen by screen. Open bridge.testnet.whitechain.io to follow along. For the trust model, routes, fees, limits, and contract addresses, see Portal bridge. Every route runs both ways. The screens below follow WBT from Whitechain to Ethereum. The reverse direction differs in two places, both called out below. Fees are denominated in the source network’s token, and a token route asks for an approval before the transfer. The app is a browser page that your own wallet signs for. It never holds your keys or your funds, and it never asks for them. The bridge itself is a different matter: while a transfer is in flight, your funds sit in Portal contracts that Whitechain controls. See Custody and the alternative path.Before you start
The bridge form
The form is explorable before you connect anything. You can pick networks and a token, and read the estimate line, while only the submit button stays gated.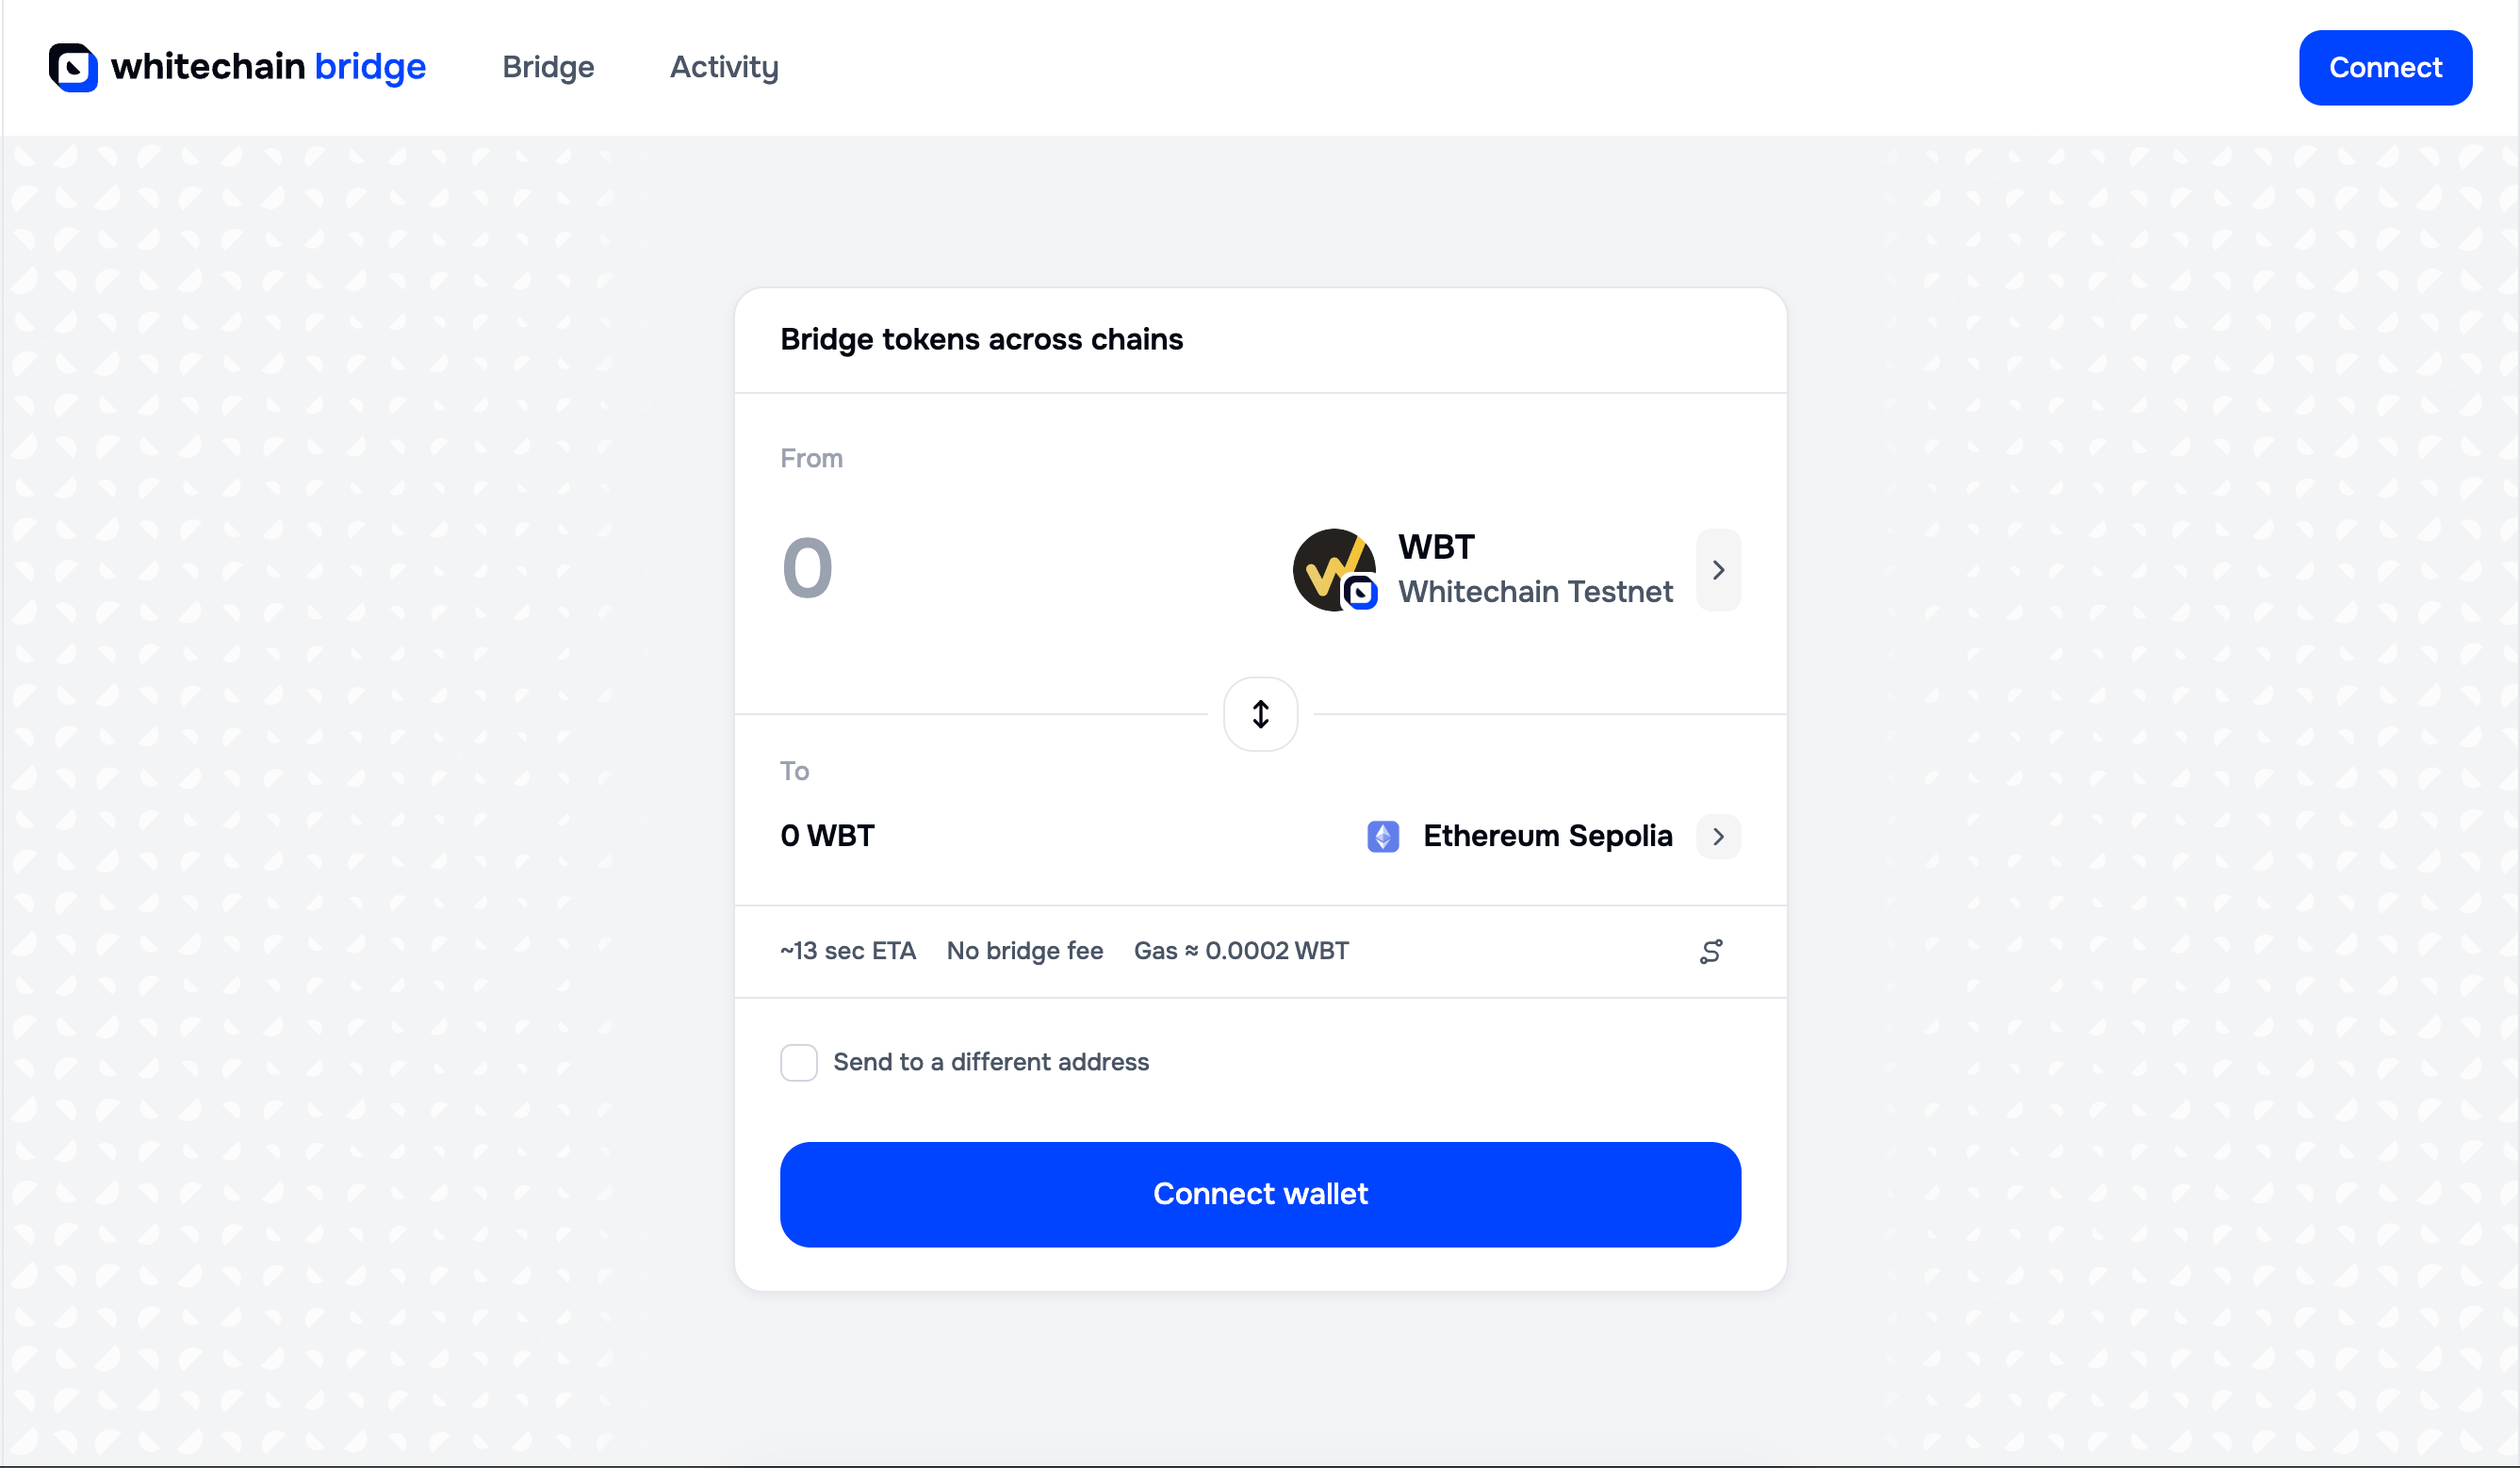
The bridge form with a source network, a destination network, and the estimate line
Choose the asset and the network
Both rows carry an asset chip, and selecting one opens a two-step picker. The first step is the asset.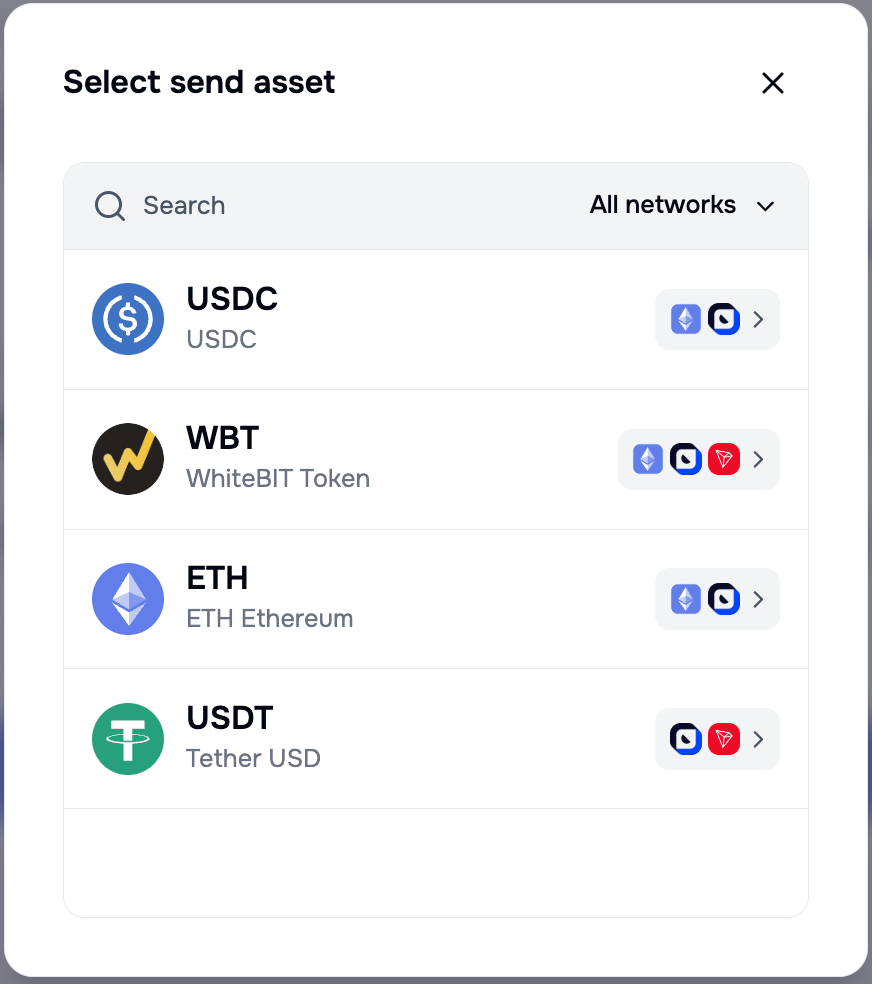
Each asset row shows the networks it reaches, and the filter narrows the list to one network
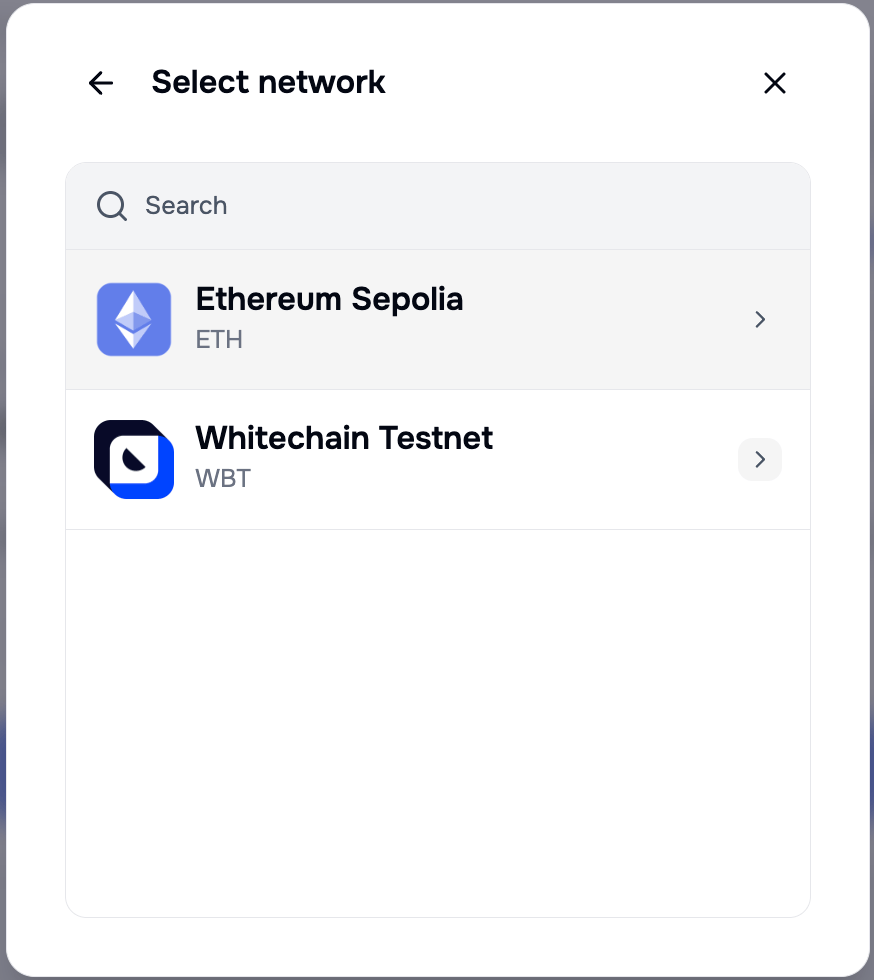
The network step lists only the networks the chosen asset supports
Connect a wallet
Select Connect wallet. The dialog has a search field, marks a detected wallet as Installed, and scrolls through the full list.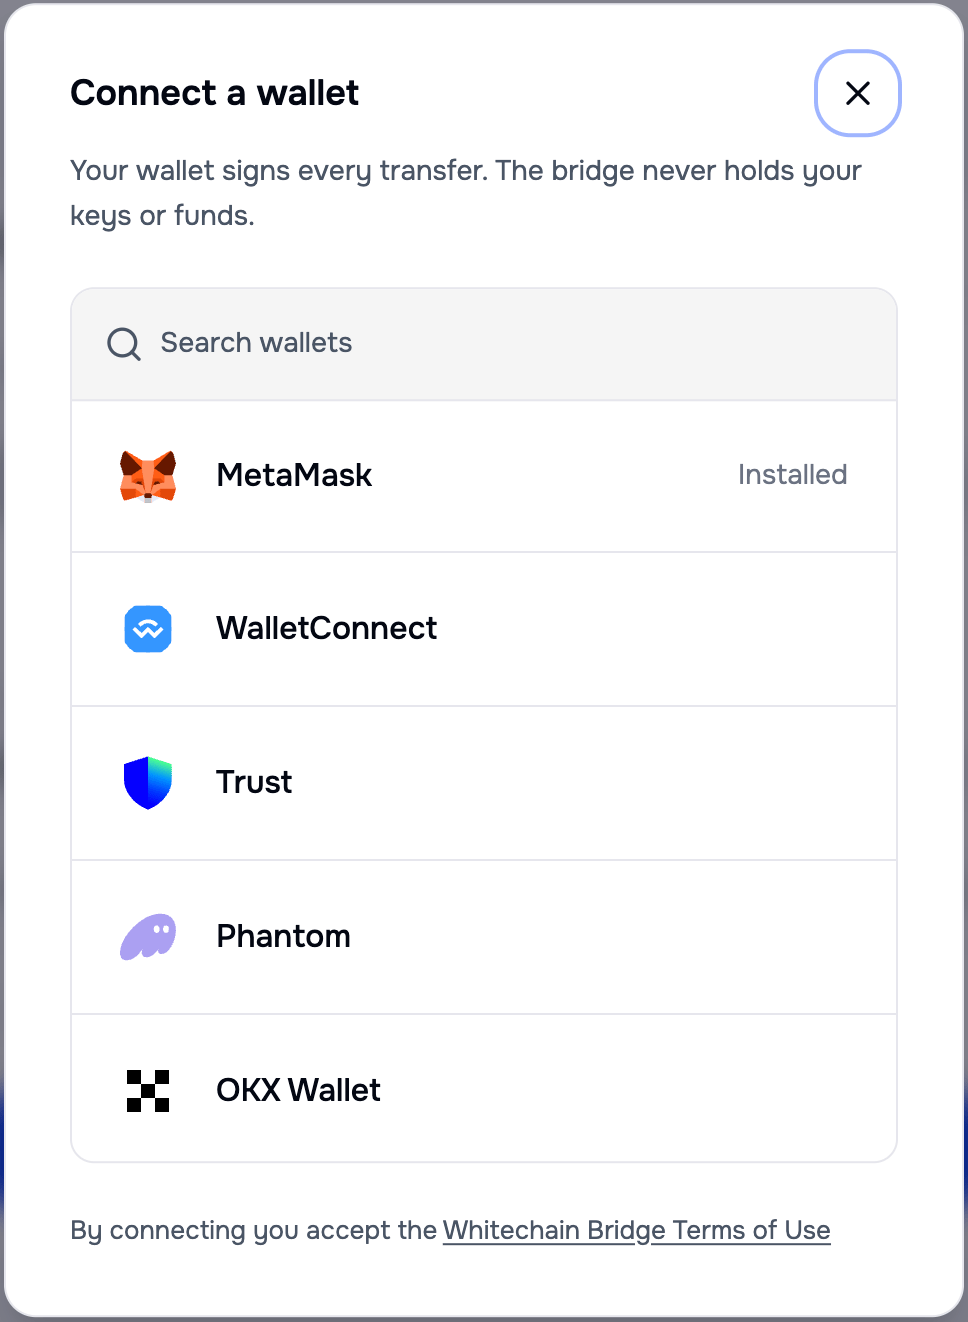
The top of the list, with MetaMask detected in this browser
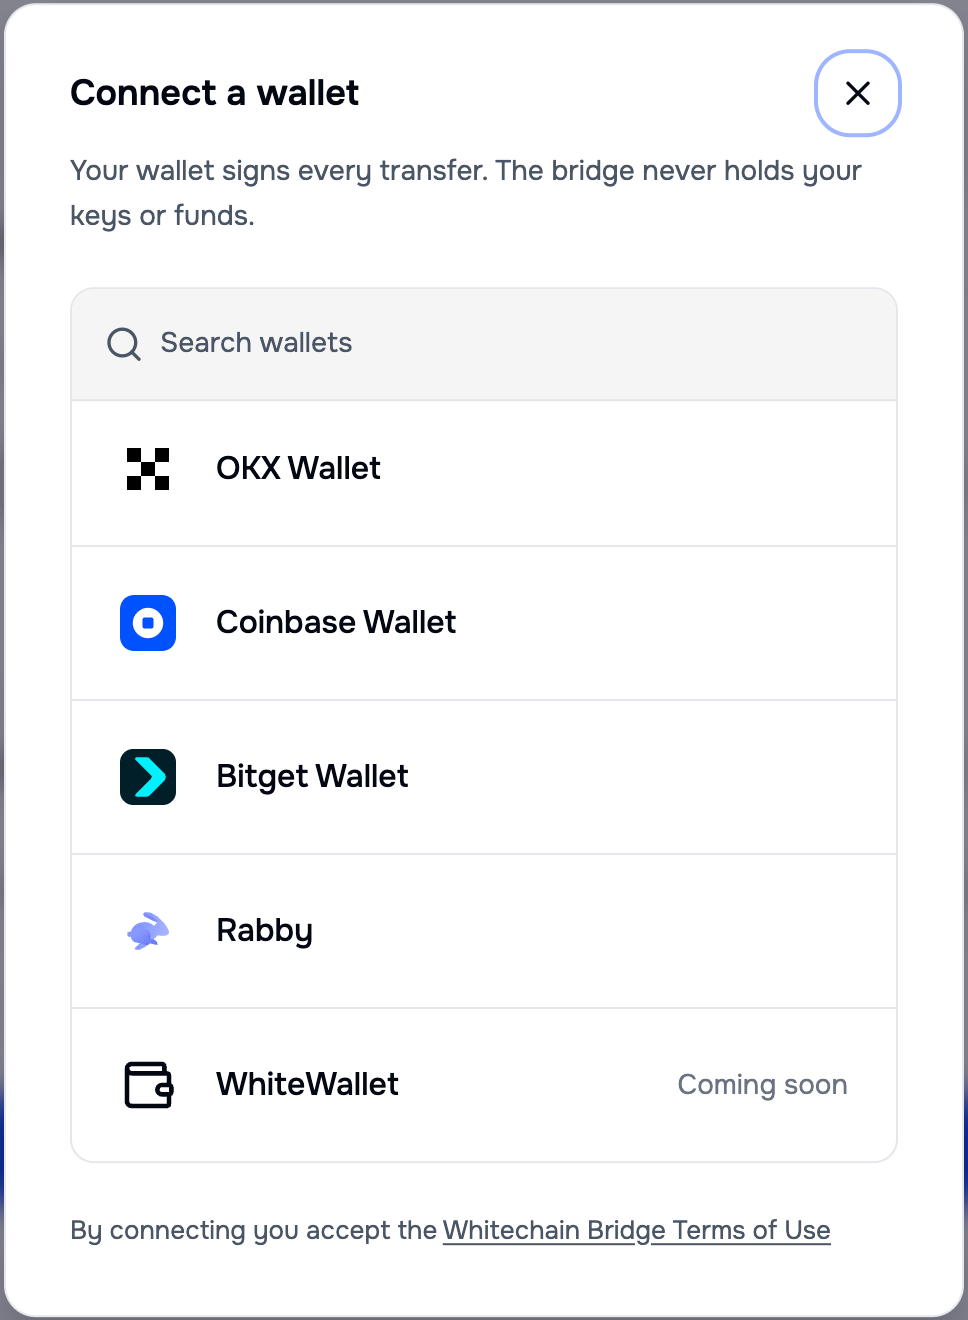
The rest of the list, ending with WhiteWallet marked Coming soon
Tron routes need a Tron wallet
Tron routes connect through the TronLink or OKX wallet adapters. A Tron route requires the Tron wallet, and the app never asks an EVM wallet to sign a Tron transaction, or the reverse.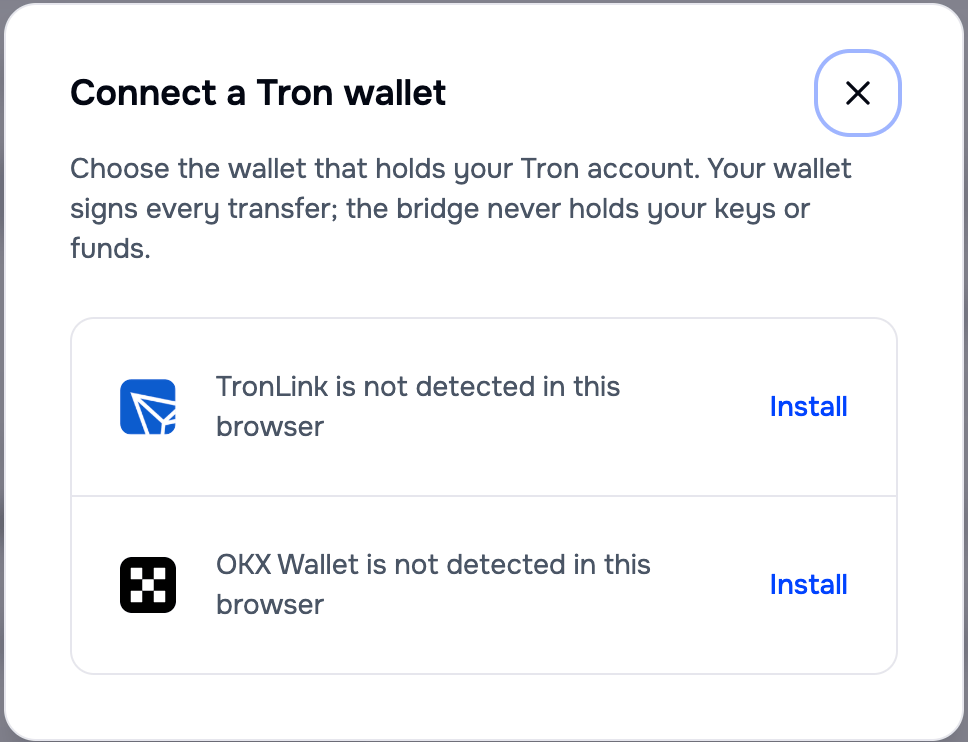
The Tron dialog offers an install action for a wallet it cannot detect
Switch to the source network
Your wallet has to be on the network you are sending from. When it is not, the submit button becomes a switch action naming the network you need, and no transfer can be submitted until you take it.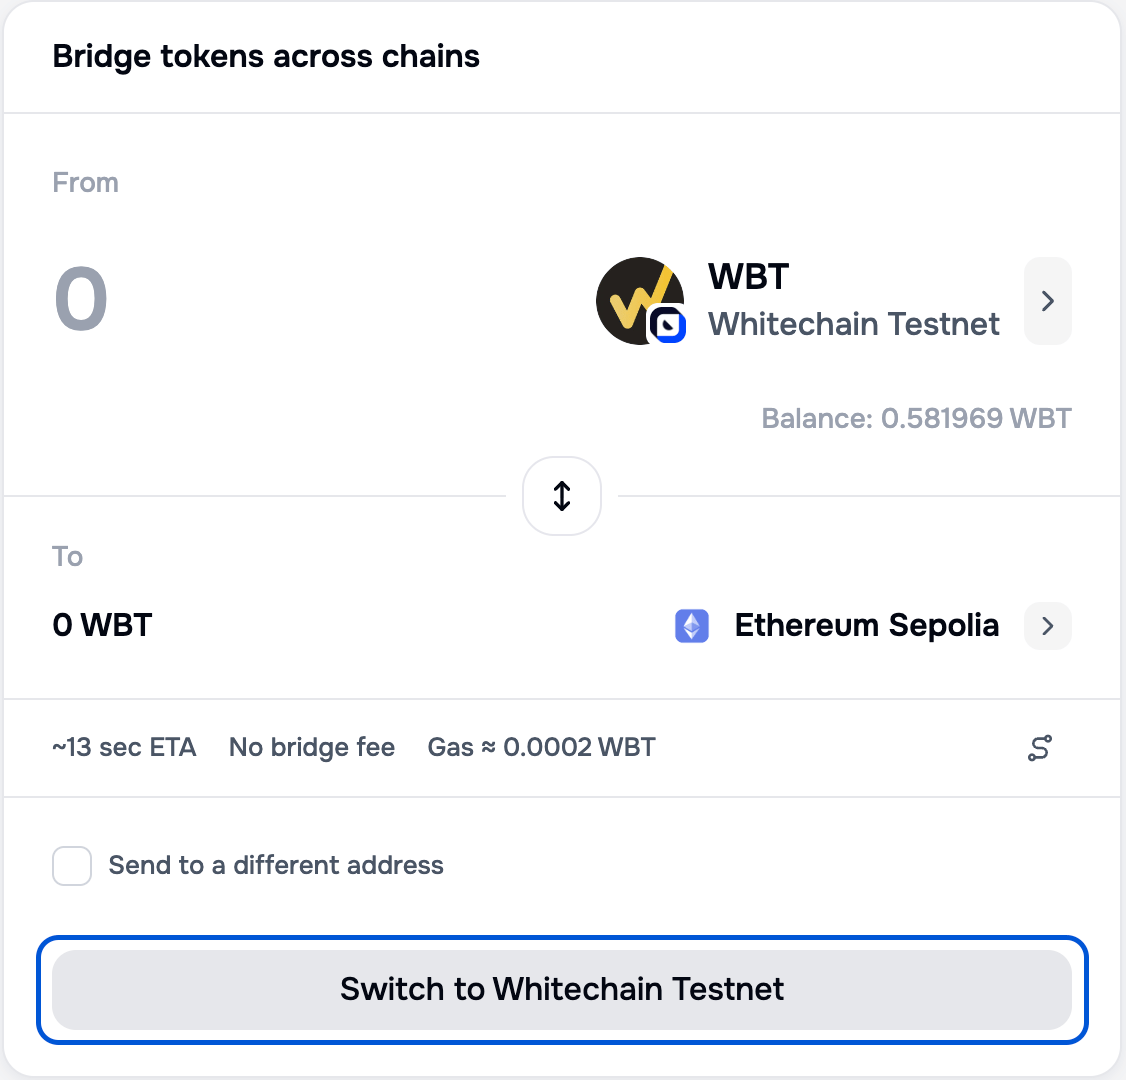
The wallet is on Ethereum Sepolia while the transfer starts on Whitechain Sepolia, so the button offers the switch
Enter an amount
Type an amount, or select Max. Once there is an amount, the estimate line prices the transfer.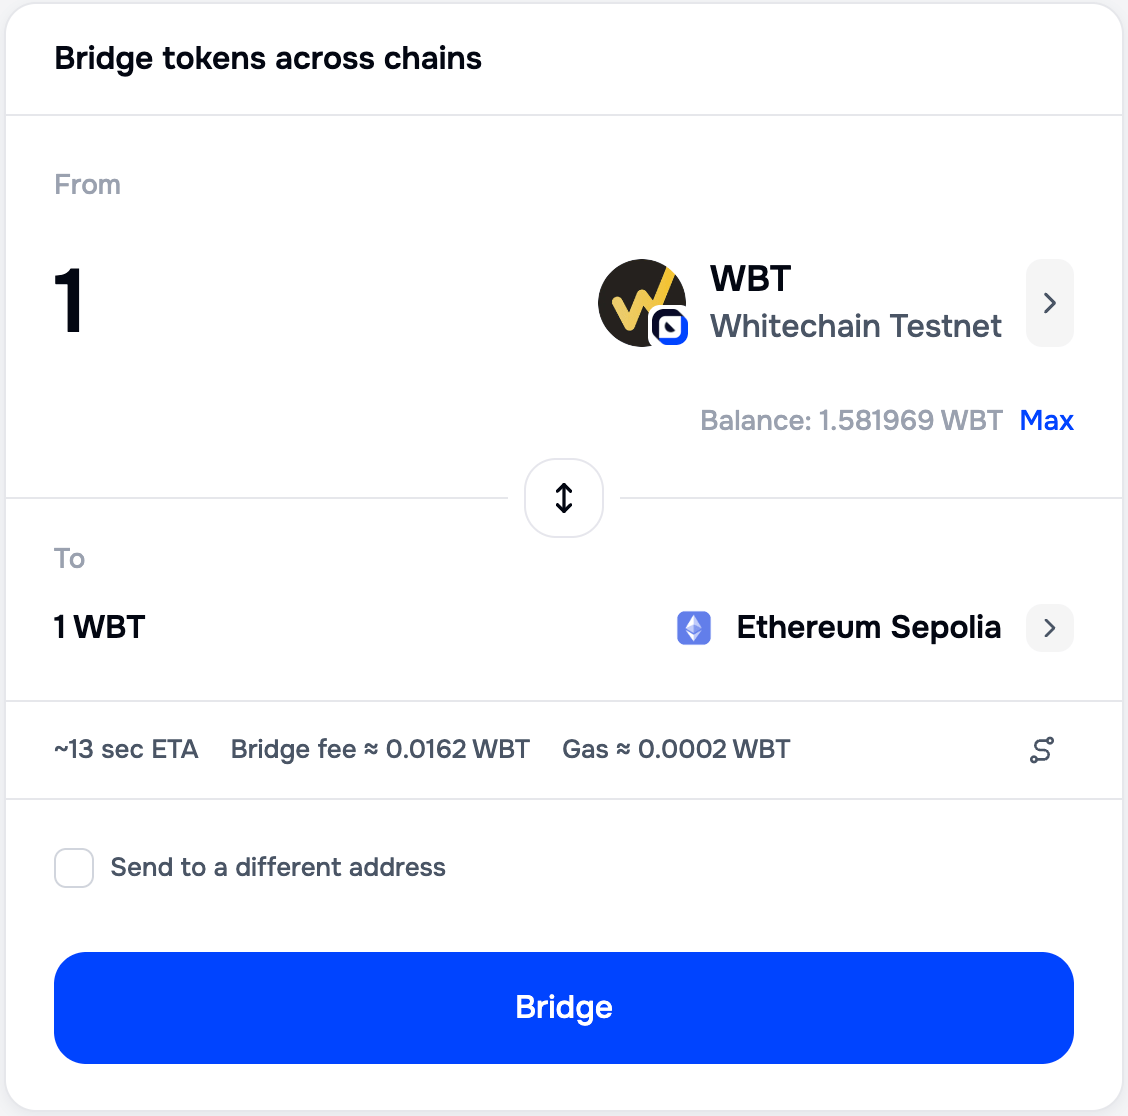
With an amount entered, the estimate line shows the bridge fee and the gas separately
Send to a different address
Select Send to a different address to enter a recipient other than the connected wallet. Leave it clear and the funds arrive at the address you connected with.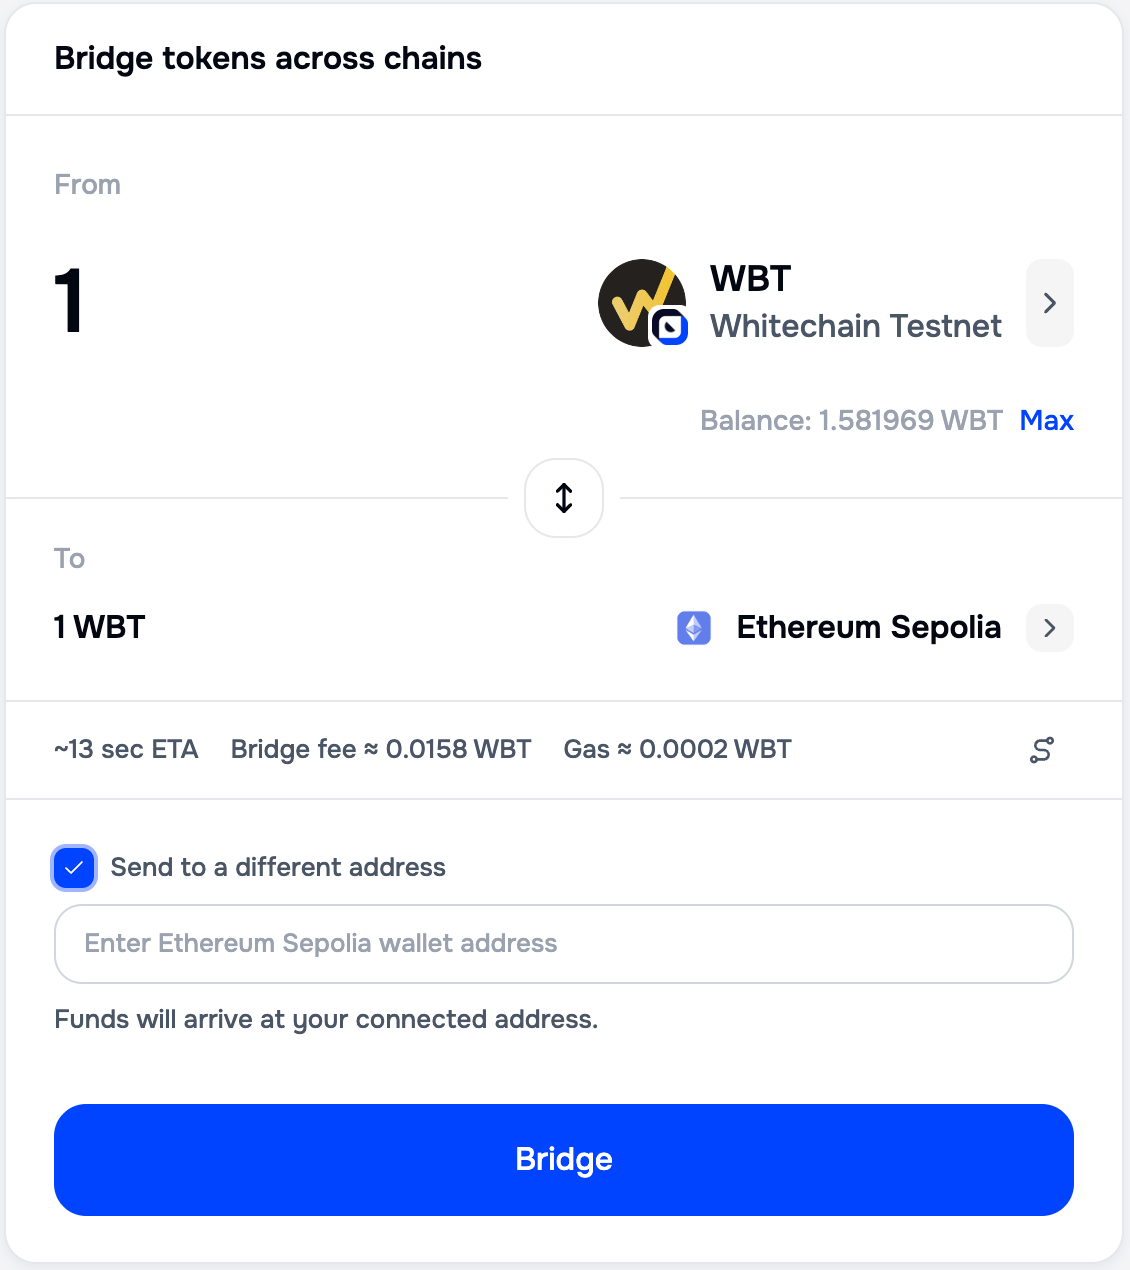
The recipient field validates the address against the destination network
Review and confirm
With the wallet on the right network and a valid amount, the submit button becomes Bridge.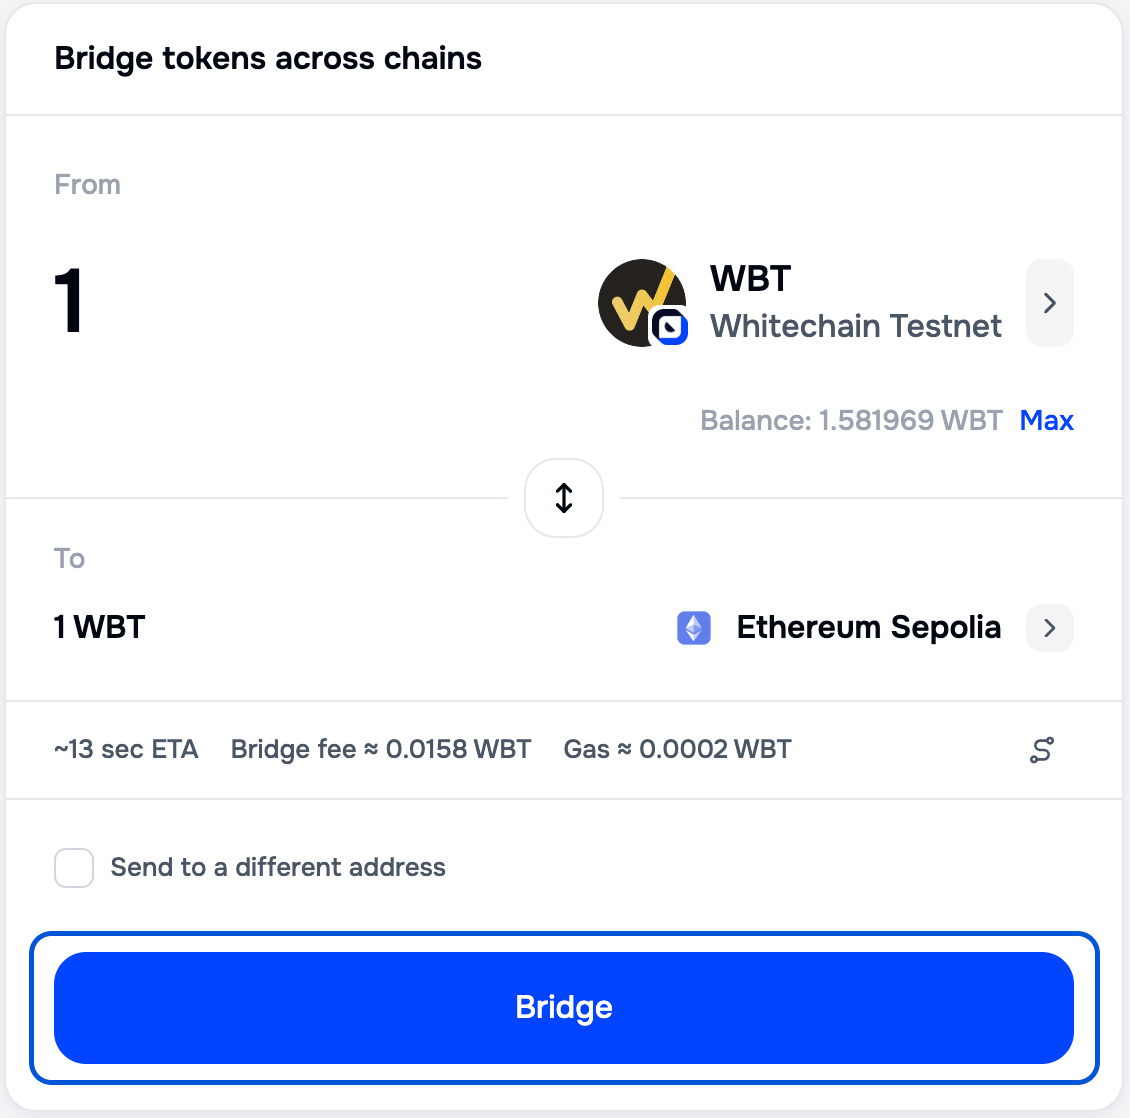
On the source network with a valid amount, the form is ready to submit
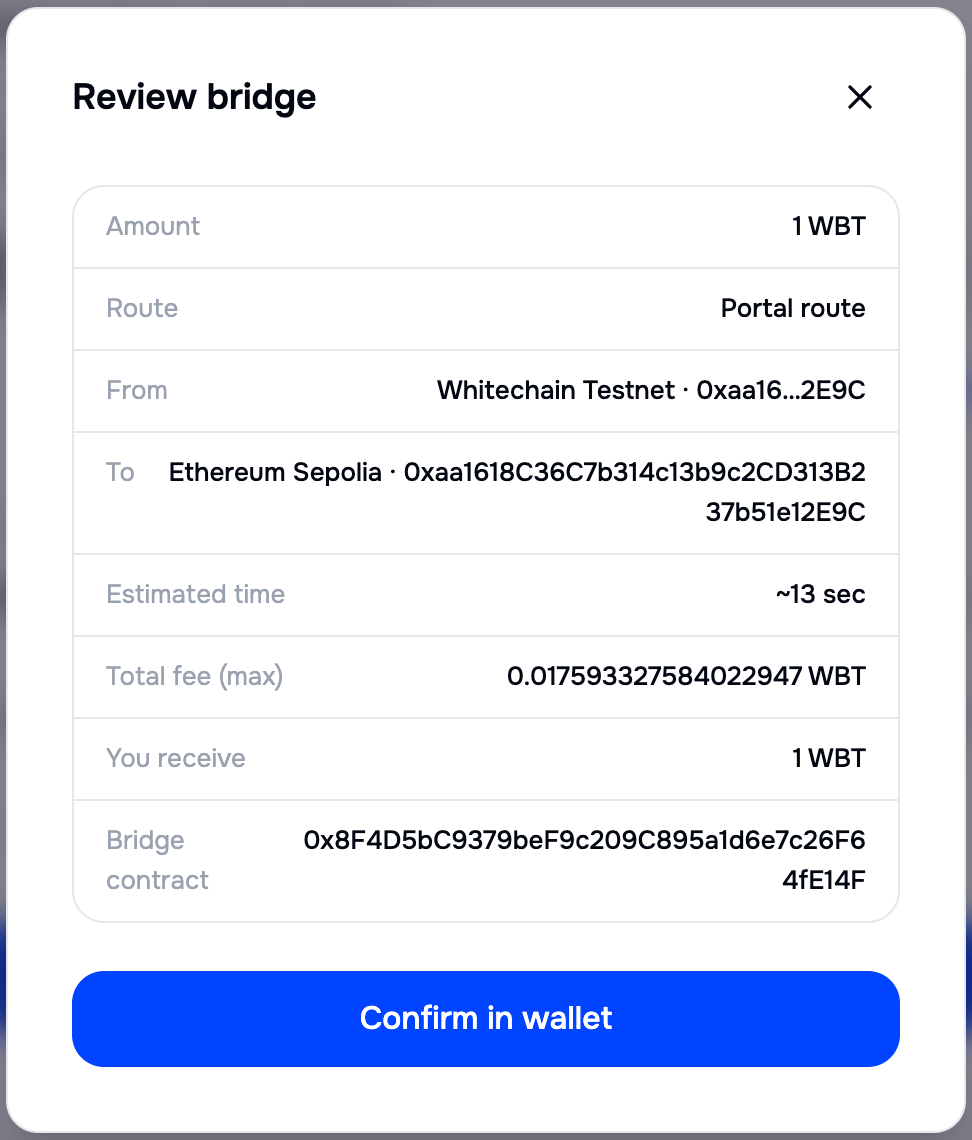
The review screen states every value, including the bridge contract you are about to call
Token routes ask for two signatures
How many signatures you give depends on what you are sending. The native token of the source network takes one, the transfer itself, which is the case for WBT leaving Whitechain, because WBT is the gas token there. A token contract takes two, first an approval and then the transfer, which is the case for the same WBT leaving Ethereum, where it is an ERC-20. The review screen tells you which one you are in for before you sign anything.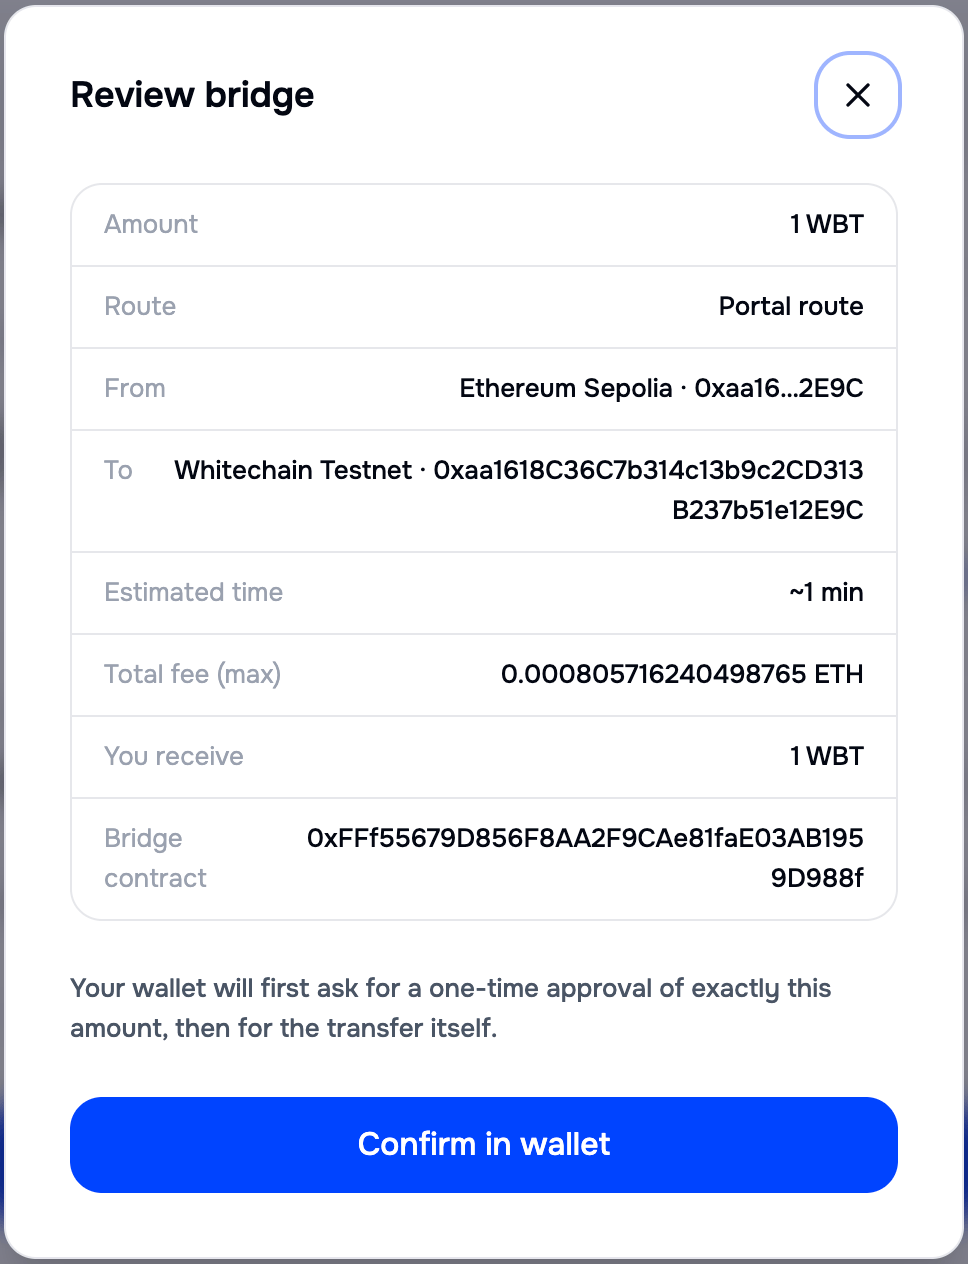
Leaving Ethereum, the review screen says two signatures follow
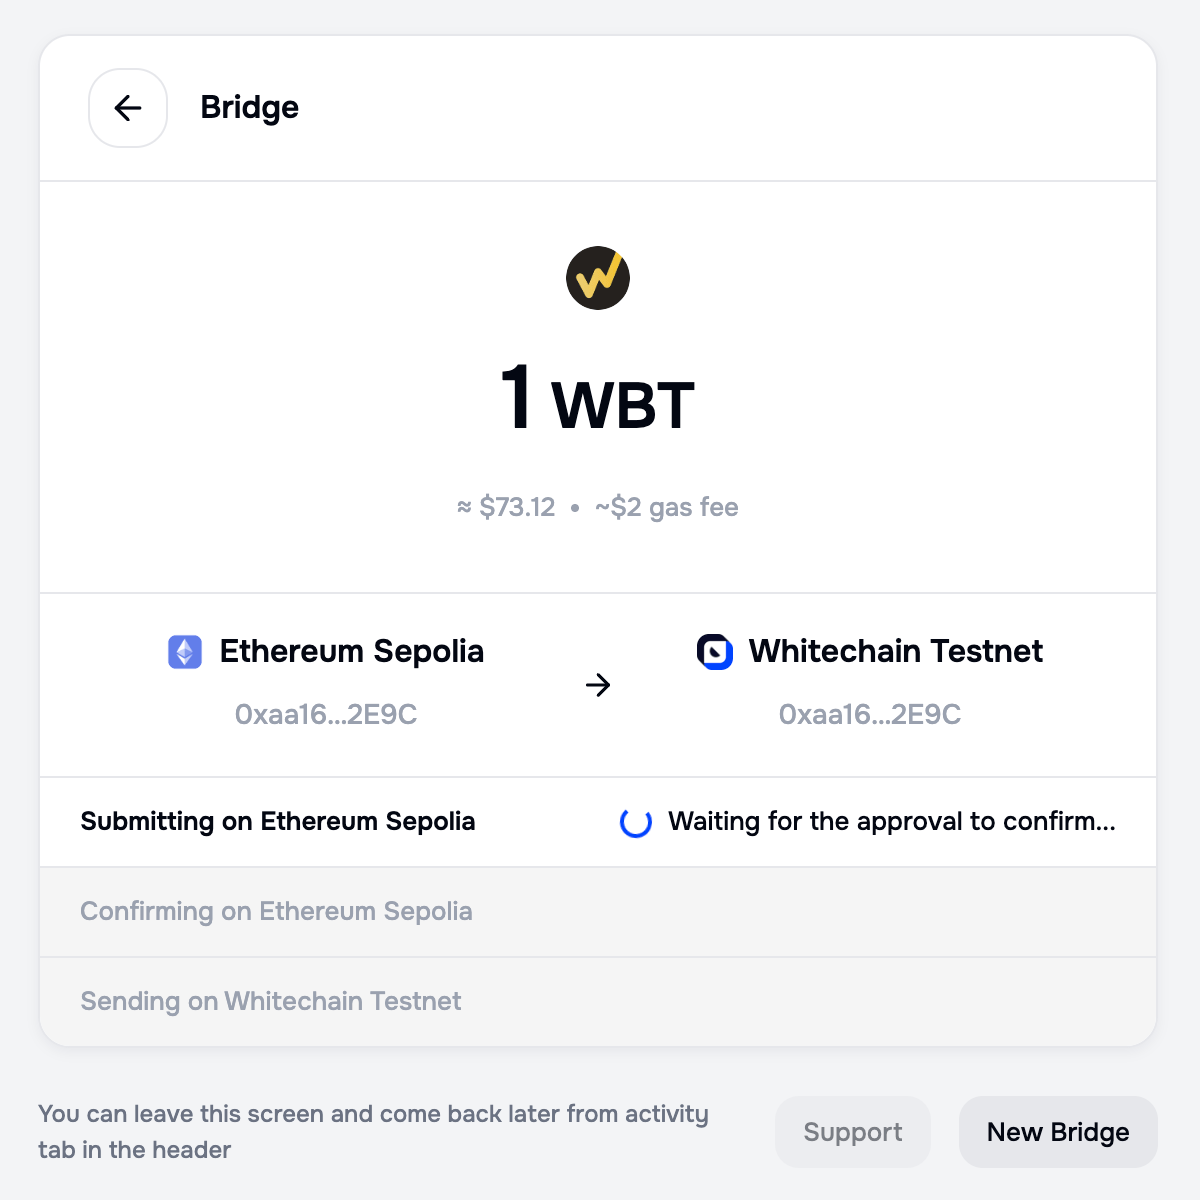
The tracker waits for the approval before it requests the transfer
Track the transfer
After you sign, the app shows a live tracker. You can close the tab: the transfer continues, and you can reopen it from Activity. The tracker moves through three stages, then marks the transfer complete. The screens below show them in order.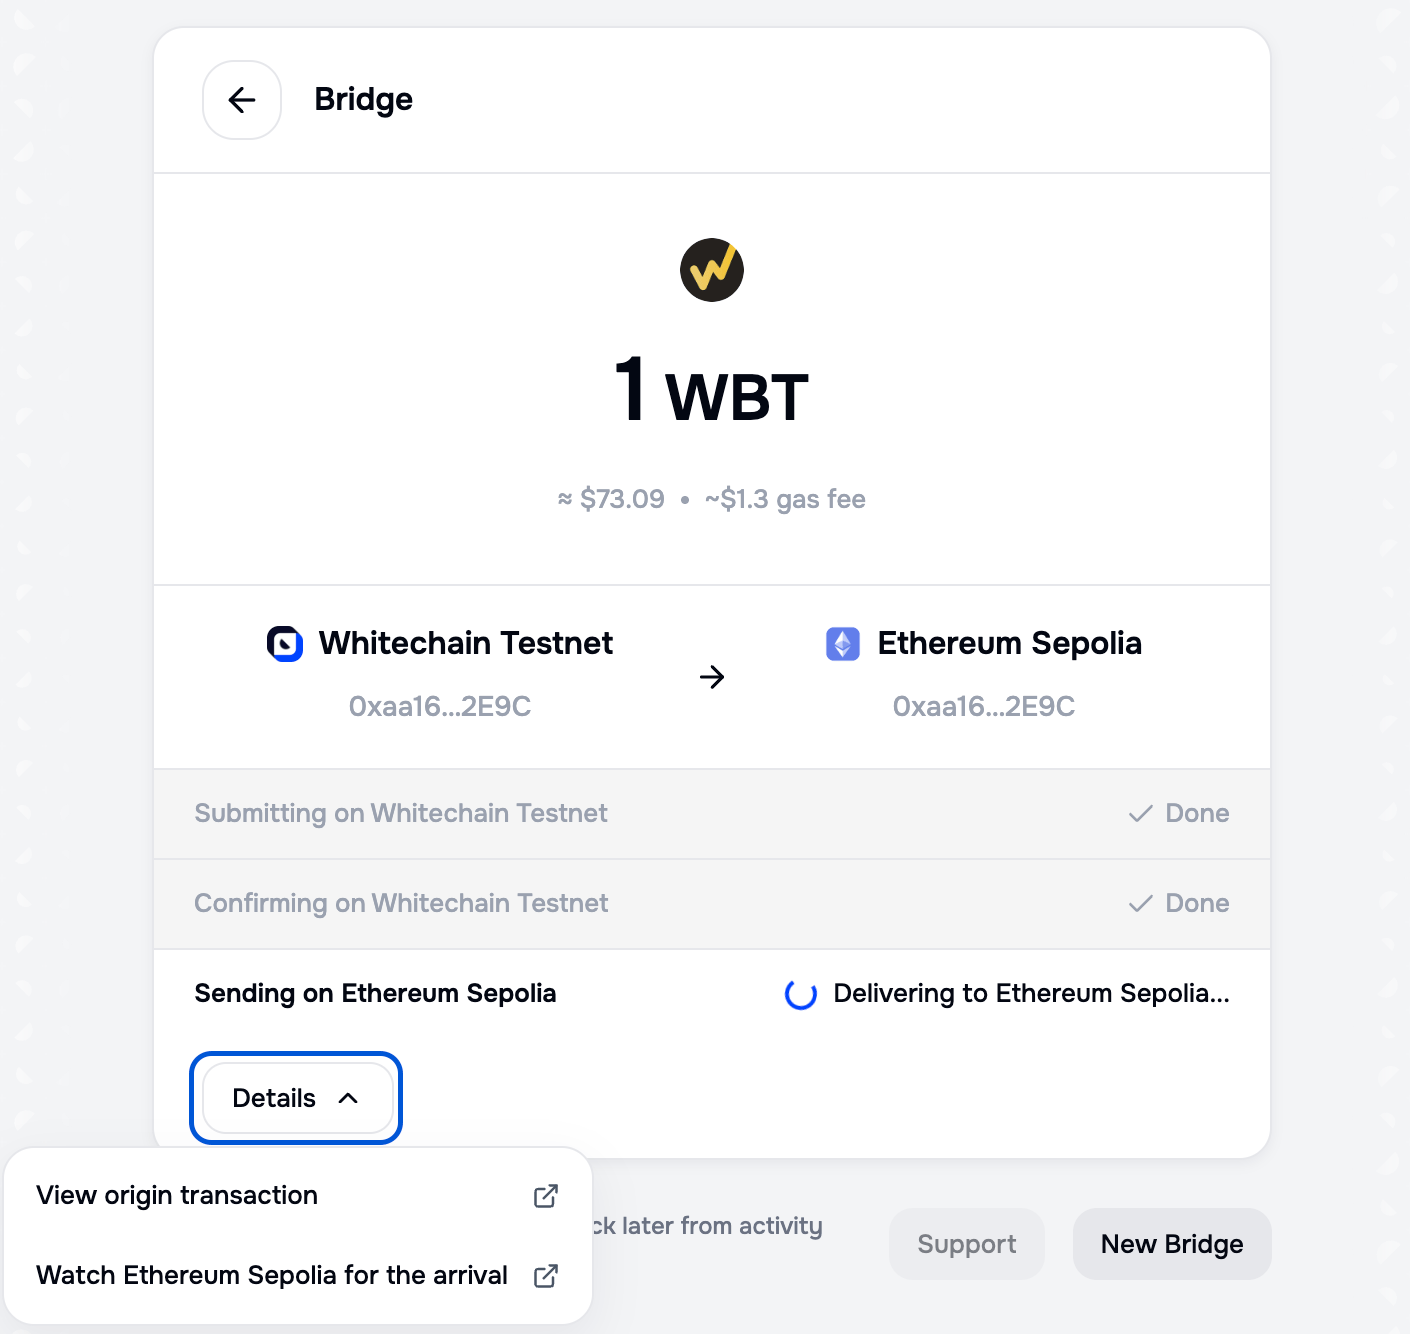
The Details menu links the origin transaction and the destination network while the transfer is in flight
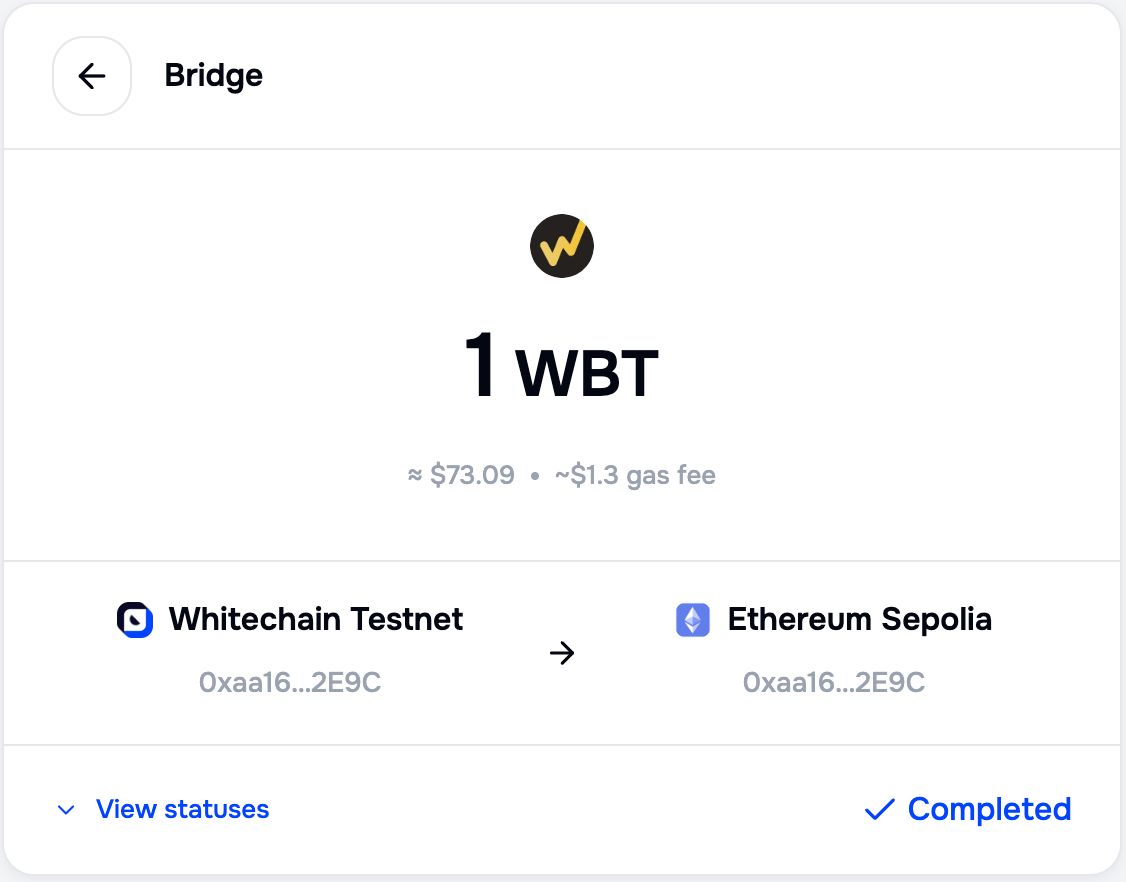
A finished transfer is marked Completed
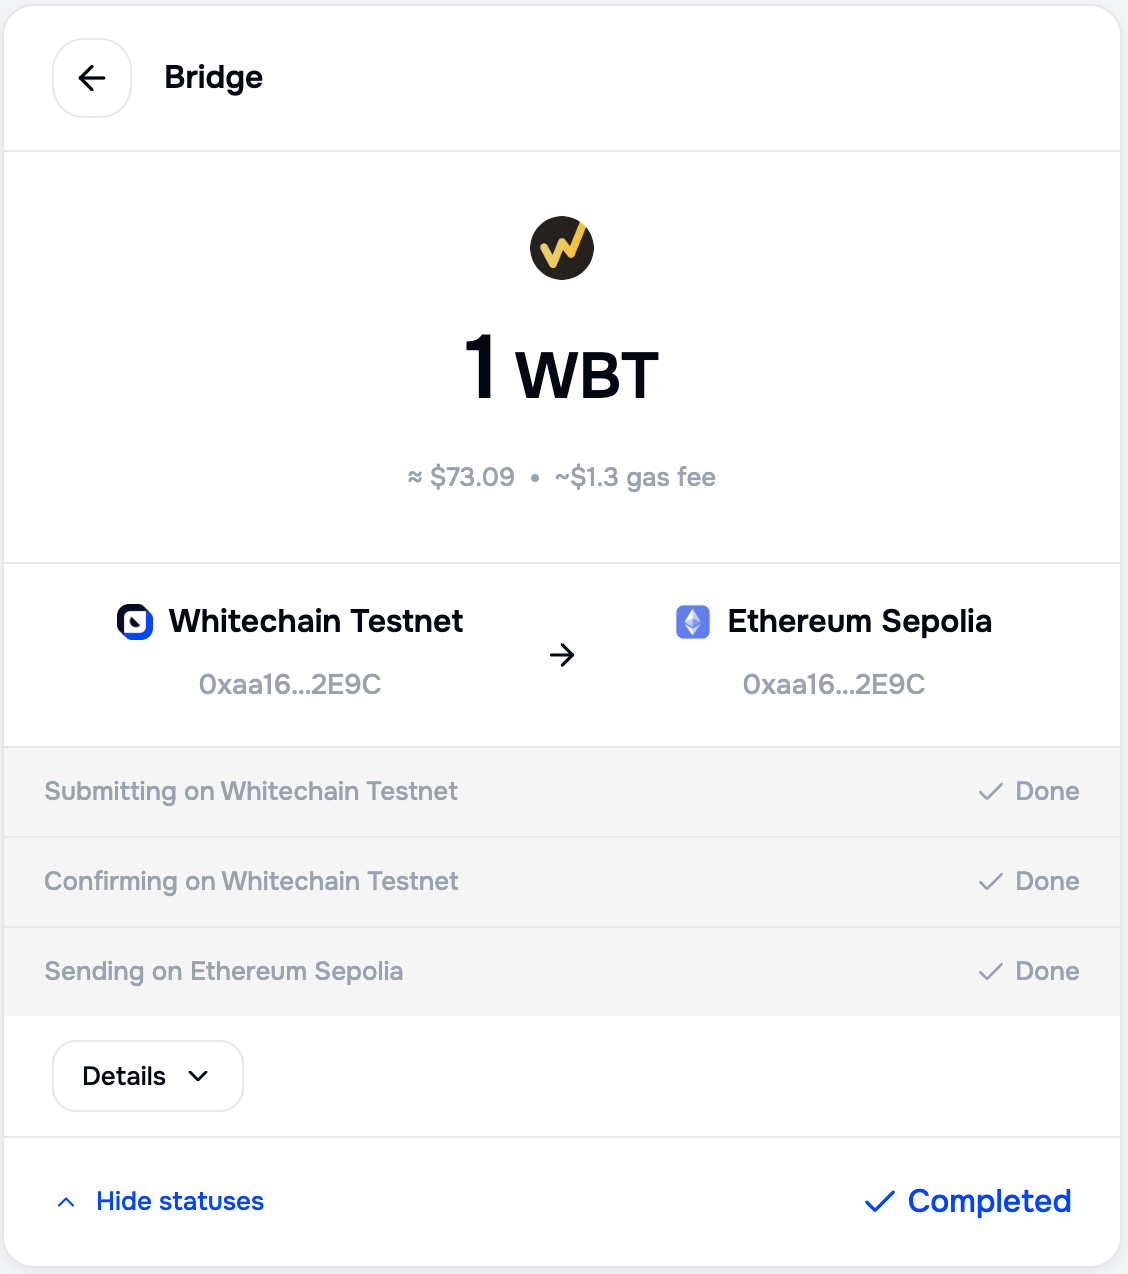
The expanded stage list on a completed transfer
When a transfer fails
A stage that fails is marked Failed, and a banner names the network it failed on. The stages before it keep their state, so you can see how far the transfer got.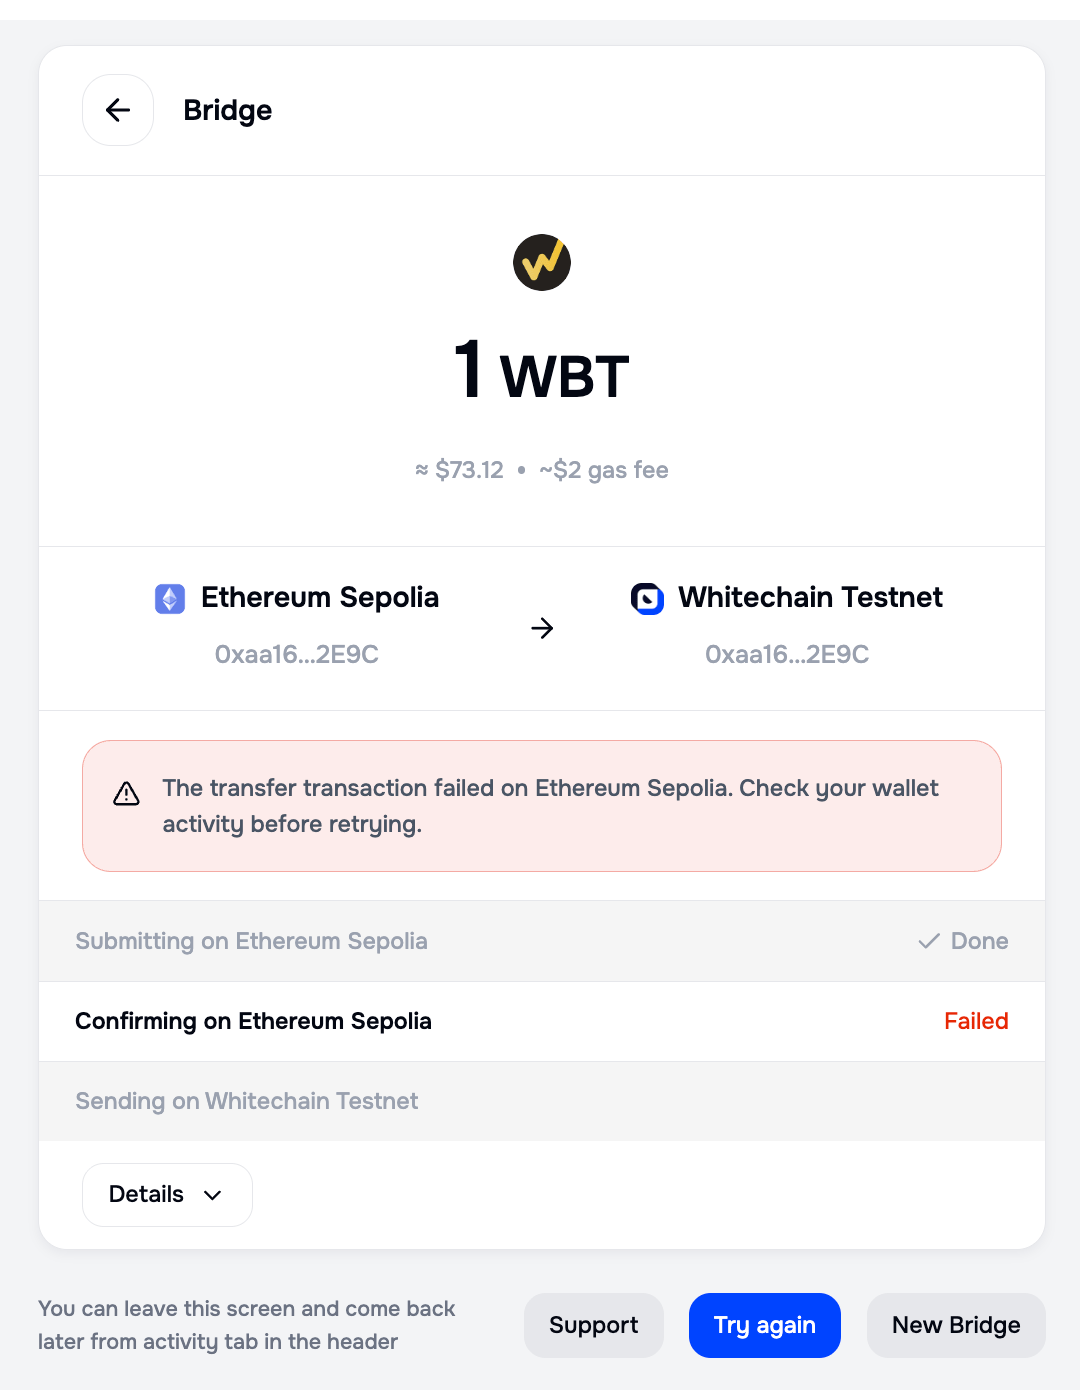
A failed source transaction, with the retry and support actions
Find a past transfer
Activity in the header lists the transfers of the connected wallet, with the amount, the direction, the date, and the status. Filters narrow the list, and every row opens the same tracker as the live transfer.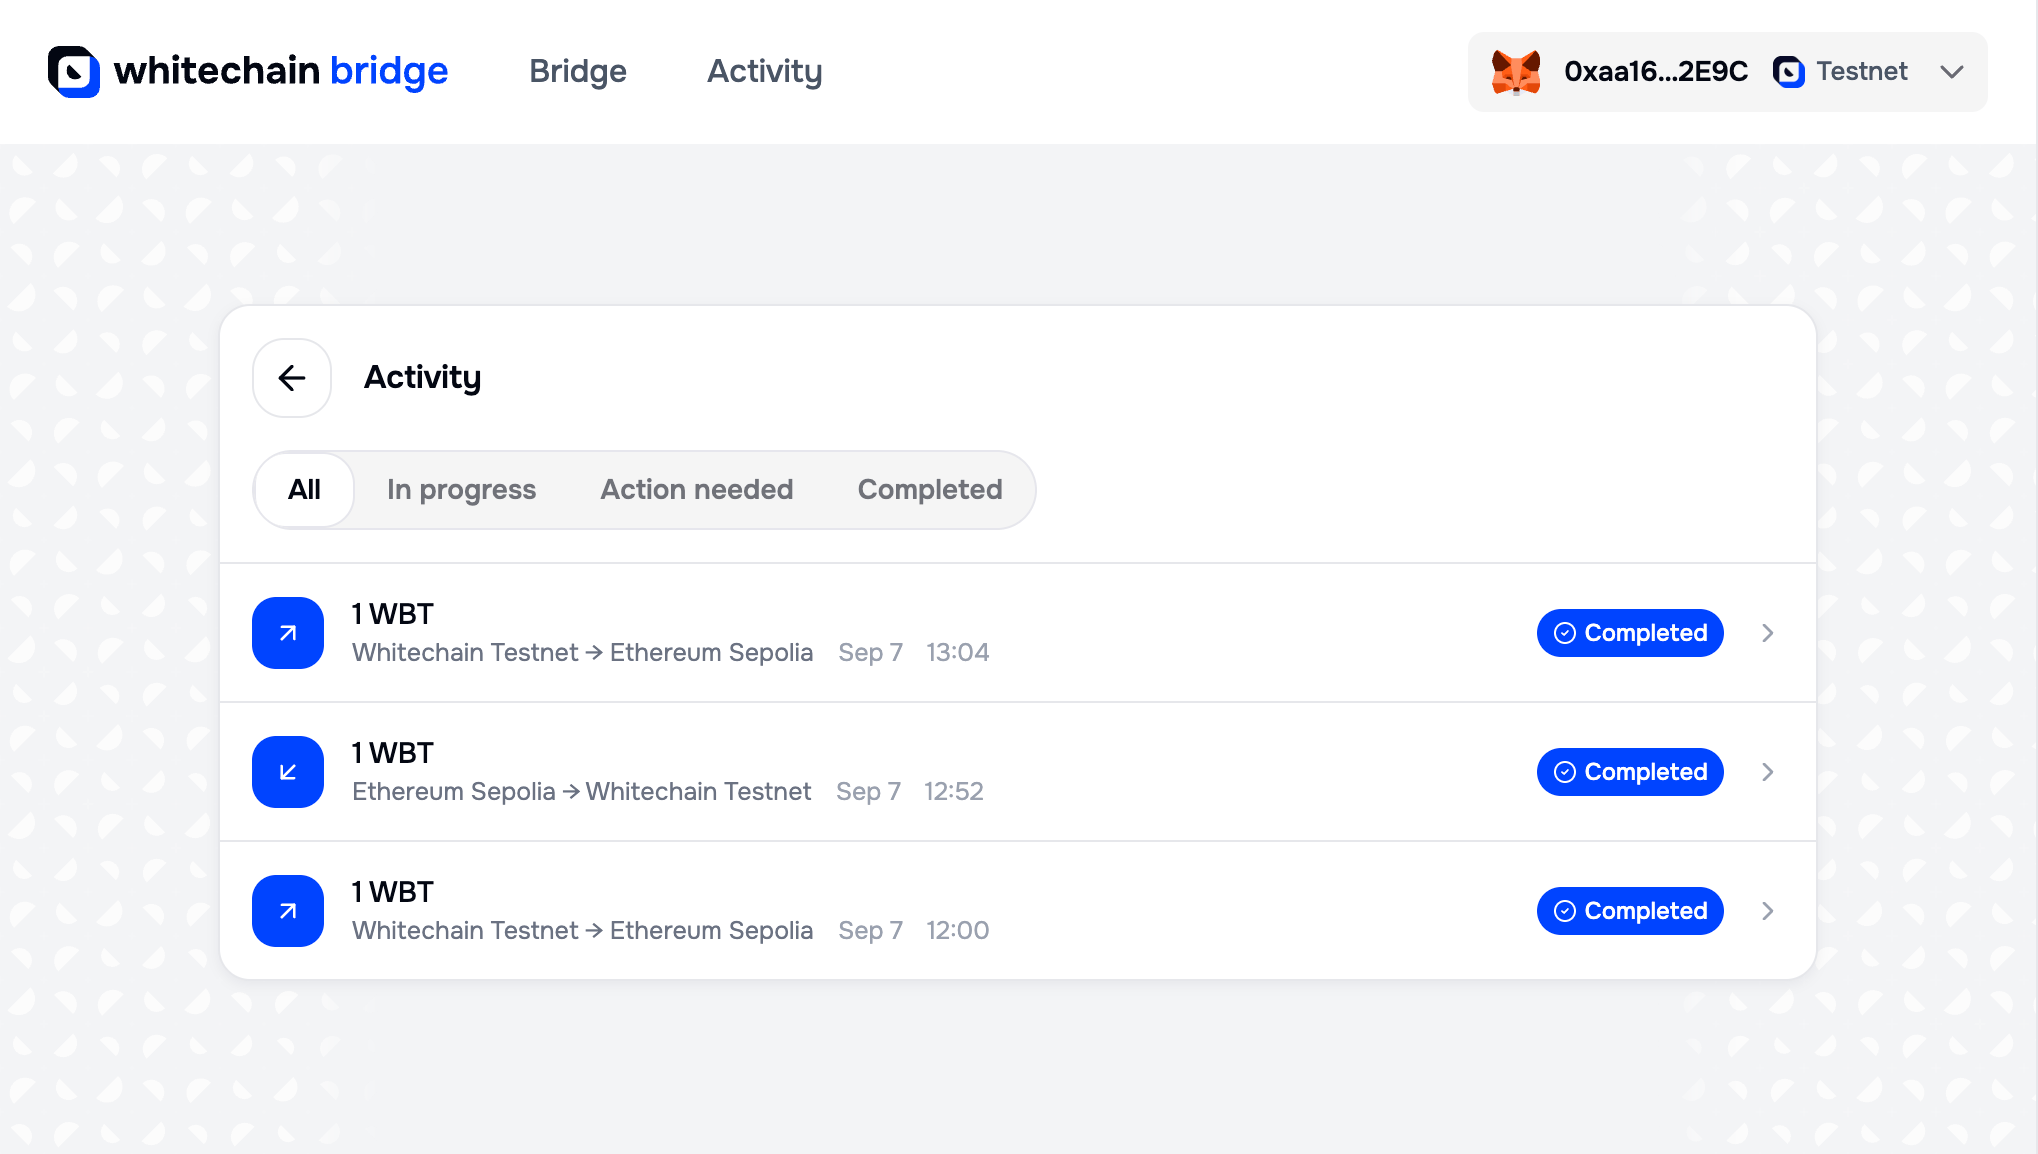
Activity lists the connected wallet's transfers in both directions, with status filters
Manage connected wallets
The wallet button in the header opens a popover listing what is connected. It copies the address, disconnects the wallet, and adds a second one, which is what a Tron route needs alongside an EVM wallet.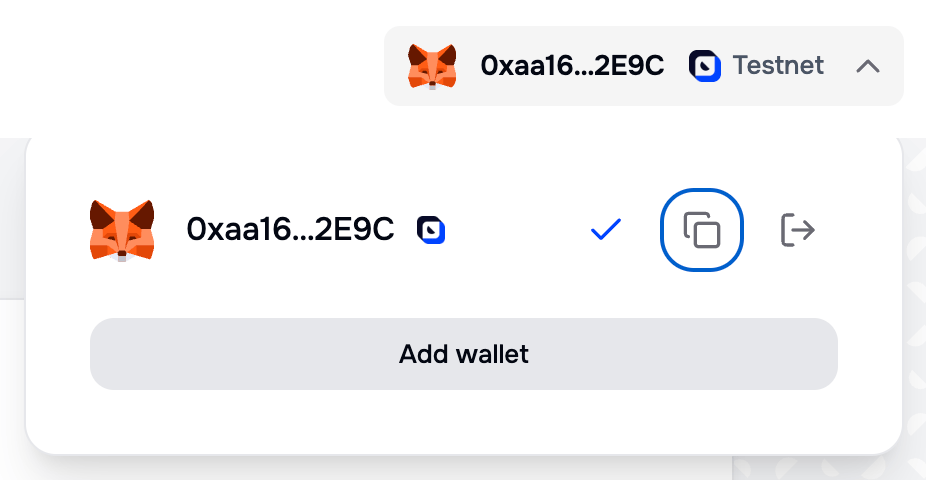
The header popover manages the connected wallets